How To Fix A Broken Blood Feather Safely?
Seeing your bird bleed can feel scary. A broken blood feather looks alarming, but you can handle it with calm, quick action.
Blood feathers are new feathers still growing in. They carry an active blood supply inside the shaft.
When one breaks, it can bleed a lot. This often happens during play, a fall, or a clipped wing accident.
The good news? Most cases are manageable at home with the right steps.
In a Nutshell
- Check the bleeding first. Only remove the feather if it bleeds a lot. Small bleeds often stop on their own.
- Restrain your bird gently. Wrap them in a towel to keep them still and safe during the process.
- Grip the feather shaft firmly. Use small pliers or hemostats to hold it close to the base.
- Pull in one swift motion. Do not stop halfway. A single, quick pull causes less pain and trauma.
- Stop the bleeding right away. Press sterile gauze on the spot. Add cornstarch or styptic powder to seal it fast.
- Watch for rebleeding. If blood returns, repeat the pressure and powder steps with clean tools.
What Is a Blood Feather and Why It Bleeds
A blood feather is a new feather that is still growing in on your bird’s body. These feathers contain active blood vessels that supply nutrients while they develop. When a blood feather breaks, it can bleed noticeably because of this active blood supply.
Your bird’s feathers go through different growth stages. Young, developing feathers have a waxy outer coating called a sheath. Inside this sheath runs a small blood vessel that nourishes the growing feather.
Once the feather fully matures, the blood supply stops flowing. The vessel closes off, and mature feathers no longer bleed when broken. This is why only new feathers cause bleeding problems.
A broken blood feather bleeds because the active vessel inside gets damaged. The amount of bleeding depends on how badly the feather broke and where the break occurred. Some breaks cause light oozing, while others produce steady bleeding.
You can identify a blood feather by its appearance. These feathers look darker or have a visible blood line running through the shaft. They feel softer than mature feathers. Mature feathers appear lighter in color and feel stiff.
Not every broken blood feather needs removal. Light bleeding often stops on its own within minutes. Heavy or continuous bleeding requires action to prevent your bird from losing too much blood.
Understanding blood feathers helps you stay calm during emergencies. Knowing why they bleed and how they work lets you respond quickly and confidently. Your bird depends on you to act fast when bleeding happens.
The key is recognizing the situation and responding with steady, purposeful actions rather than panic.
Signs You Need to Act Immediately
Your bird’s behavior tells you everything. Watch for these clear warning signs that demand immediate action.
Continuous bleeding is your first alert. If blood drips steadily or flows from the broken feather area, act now. A few drops are normal, but ongoing bleeding means the blood vessel is still open and active.
Your bird will show visible distress. They may fluff their feathers, move restlessly, or vocalize more than usual. Some birds try to peck at the injury, which makes bleeding worse. This behavior signals pain and stress.
Blood on the feathers or skin around the break point is obvious. Look at the surrounding area too. If you see blood spreading or soaking into nearby feathers, the situation needs immediate attention.
Lethargy or weakness indicates serious blood loss. Your bird may sit quietly without moving, seem unresponsive, or have drooping wings. This is an emergency sign. Small birds lose blood faster than large ones, so act quickly.
Pale or white gums and feet show your bird is losing too much blood. Check inside the mouth if safe. Healthy bird gums are bright pink or red. Pale gums mean circulation is dropping.
Labored breathing or rapid panting suggests your bird is in shock. This requires immediate veterinary help, not just home care.
Don’t wait if you see any combination of these signs. The longer bleeding continues, the weaker your bird becomes. Speed matters here. Grab your supplies and restrain your bird gently but firmly. Every minute counts when active bleeding is happening. Call your avian vet while you work, so they’re ready if your bird needs emergency care.
Preparing Your Bird and Supplies for Safe Removal
Preparing your bird and supplies requires calm, organized steps. Gather everything before you start so you won’t scramble mid-process. Your bird needs a safe space, and you need the right tools within arm’s reach.
Start by setting up a clean, well lit area. A bathroom or kitchen works well because you can control the space and access water easily. Lay out all supplies on a nearby table so nothing is out of reach during the procedure.
You’ll need small pliers or hemostats to grip the feather shaft. Make sure these tools are clean. Sterile gauze pads are essential for applying pressure afterward. Keep cornstarch or septic powder ready in a small container. Have paper towels nearby to catch any blood and keep your workspace manageable.
Prepare a soft towel for restraint. Choose one that’s large enough to wrap your bird gently but firmly. The towel keeps your bird still and protects both of you during the removal. Practice your towel wrapping technique before the actual moment so you move with confidence.
Wash your hands thoroughly with soap and water. Clean hands reduce infection risk for your bird. If possible, have another person present to help. One person can hold the towel wrapped bird while the other handles the feather removal.
Keep your phone nearby in case you need to contact your avian veterinarian quickly. Have your vet’s number saved so you don’t waste time searching.
Stay calm and breathe slowly. Your bird senses your anxiety. When you’re prepared and organized, the entire process goes faster and smoother. Your bird experiences less stress, and you handle the situation with confidence and control.
Step-by-Step Guide to Removing a Broken Blood Feather
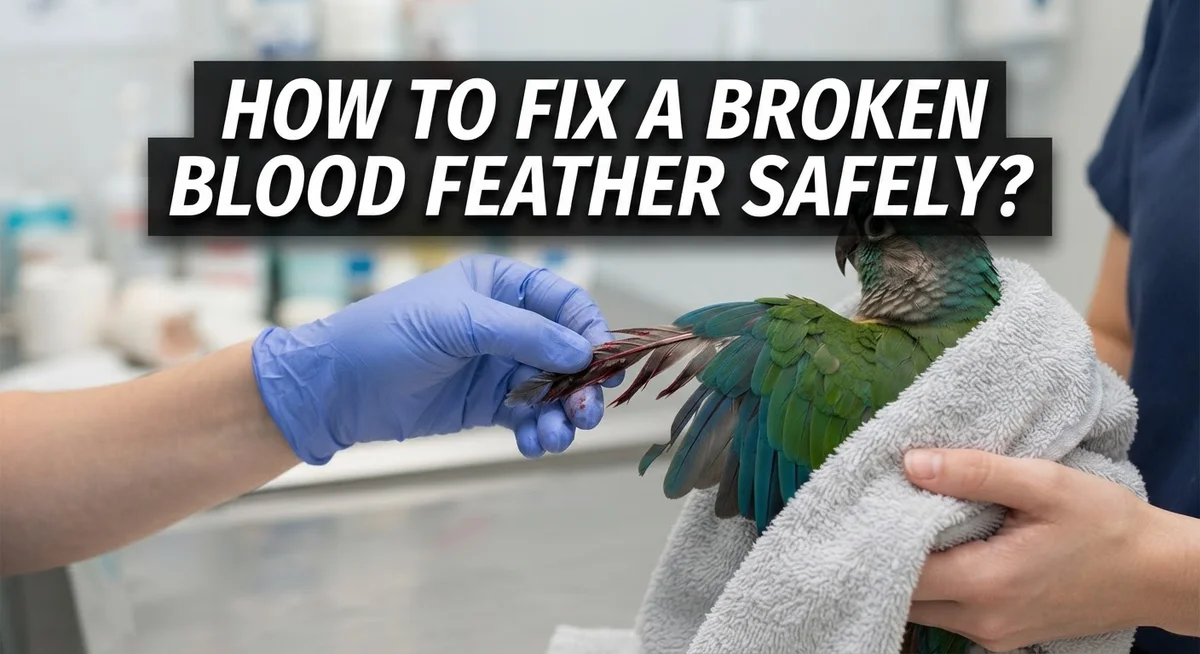
Start by securing your bird safely. Wrap your bird gently in the soft towel, leaving only the wing or area with the broken blood feather exposed. Have someone help you if possible, so one person holds the bird steady while the other works on the feather.
Get a firm grip on the feather shaft right at the base where it enters the skin. Use your small pliers or hemostats to hold the shaft securely. This grip is essential because a loose hold causes additional trauma and pain. Make sure you’re holding the actual feather shaft, not the surrounding skin or other feathers.
Take a deep breath and pull the feather out in one swift, continuous motion. This single, confident movement is critical. Hesitating or pulling multiple times causes more damage and bleeding. Pull straight out from the base at a slight angle that follows the feather’s natural growth direction.
The moment the feather comes out, apply immediate pressure to the follicle with your clean, sterile gauze. Press firmly for at least one to two minutes. Do not peek or lift the gauze during this time, as this disrupts clotting.
Once bleeding slows, sprinkle cornstarch or septic powder directly onto the follicle area. This helps stop any remaining blood flow. Apply more gauze if needed and maintain gentle pressure for another minute.
Keep your bird calm and quiet in a warm, dark space afterward. Monitor the area for any rebleeding. If bleeding resumes, repeat the pressure and powder steps using fresh, clean tools.
Contact your avian veterinarian after removal, even if everything went smoothly. Your vet can check for infection and ensure your bird recovers properly.
Proper Restraint Techniques for a Safer Procedure
Proper restraint keeps your bird safe and prevents additional injury during blood feather removal. The goal is firm control without causing stress or harm to your pet.
Start by wrapping your bird gently but securely in a soft towel. The towel should cover the wings and body while leaving the injured feather area accessible. Your bird needs to feel supported, not trapped or frightened.
Hold your bird with one hand supporting the body. Use your other hand to stabilize the head gently. Never squeeze or apply pressure to the chest, as this restricts breathing. Your grip should be confident yet calm.
Position your bird so the broken feather is clearly visible and easy to reach. Tilt the body slightly if needed to access the feather base properly. Make sure you have a clear, unobstructed view before you begin.
Ask another person to help if possible. One person can hold the bird steady while the other removes the feather. This division of tasks reduces stress on both you and your pet.
Keep your movements slow and deliberate during setup. Sudden motions frighten birds and cause them to struggle. Speak softly to your bird throughout the process to maintain calm.
Ensure the bird cannot flap or move the injured wing during removal. Unexpected movement can cause the feather to break again or tear the follicle. Gentle but firm restraint prevents this complication.
Test your grip before proceeding. Your bird should be secure but not uncomfortable. Adjust your hold if your pet seems distressed or has difficulty breathing.
Once restraint is secure, you’re ready to proceed with safe, effective removal using your pliers or hemostats on the feather shaft.
Common Mistakes That Increase Trauma and Bleeding
Hesitant or multiple motion removal causes the most damage during blood feather extraction. Many bird owners pause mid pull or withdraw the feather partially, then try again. This repeated tugging traumatizes the follicle and causes excessive bleeding.
Your bird experiences pain with each motion. The follicle tears further, making it harder to stop the bleeding afterward. The feather shaft may break inside the skin, leaving fragments behind. This complicates healing and increases infection risk.
Pull decisively in one smooth motion. Commit fully to the extraction. Hesitation only prolongs your bird’s suffering and worsens the outcome. Practice your technique mentally before touching your bird.
Delaying pressure application is another critical mistake. Some people remove the feather, then search for gauze or powder. Those few seconds of delay allow more blood to flow from the open follicle.
Have your supplies ready before you start. Keep sterile gauze and cornstarch or septic powder within arm’s reach. Apply pressure immediately after the feather exits. This stops bleeding quickly and reduces trauma.
Improper restraint creates additional problems during removal. If your bird struggles or flaps, the feather tears at an angle. Uneven removal causes deeper follicle damage and heavier bleeding.
Secure your bird firmly before attempting extraction. Ensure the injured wing cannot move. Ask someone to help hold your bird still. A struggling bird makes precise removal impossible.
Never rush the removal process, yet never hesitate once you begin. Prepare thoroughly beforehand. Execute the extraction swiftly and confidently. Apply pressure immediately. These steps minimize trauma and bleeding significantly. Your calm, decisive actions help your bird recover faster and more completely.
Troubleshooting: What to Do If Bleeding Restarts
If bleeding restarts after you’ve already removed the feather, stay calm. Your bird needs quick action, but panic makes everything harder.
First, assess the situation. Look at the follicle where the feather came out. If blood is actively flowing, you need to stop it immediately. Grab your sterilized pliers or hemostats again. The follicle may still have a small piece of the feather shaft inside, or the wound may have reopened.
Gently clean away any clots with a fresh piece of sterile gauze. You need to see exactly where the bleeding is coming from. Dab softly. Don’t scrub or apply heavy pressure yet, as this can disturb any clotting that started.
Apply direct pressure again. Use clean, dry gauze and press firmly on the follicle for 3 to 5 minutes without lifting. Keep the pressure constant. Lifting repeatedly restarts the bleeding cycle.
Use hemostatic powder or cornstarch. Once bleeding slows, sprinkle your chosen powder directly onto the follicle. Press gently with gauze for another minute. The powder helps clotting happen faster.
Monitor closely for the next hour. Keep your bird in a quiet, warm, dark space. Stress and activity restart bleeding. Check the area every 10 to 15 minutes, but avoid disturbing the wound.
Contact your avian veterinarian immediately if bleeding doesn’t stop after 10 minutes of pressure or if it restarts multiple times. Persistent bleeding signals a deeper issue. Your vet can provide professional care and antibiotics to prevent infection.
Never attempt removal twice on the same feather without professional help.
Aftercare and When to Contact an Avian Vet
After you remove a blood feather, your bird needs proper care to heal well. Watch the extraction site closely for the next 24 hours. The follicle should remain dry and clean during this time.
Keep your bird in a quiet, warm, dark space for at least several hours after removal. This calm environment reduces stress and helps your bird recover. Avoid handling the injured wing unless necessary. Let your bird rest completely.
Check the feather follicle every few hours. Look for any signs of fresh bleeding or swelling. A small amount of dried blood around the site is normal. If you notice new bleeding, apply gentle pressure with clean gauze for several minutes.
Your bird may feel sore or tender around the injury. This is completely normal. Avoid bathing your bird for at least 3 to 5 days after removal. Water exposure can irritate the healing follicle and increase infection risk.
Contact an avian veterinarian if bleeding doesn’t stop after 10 minutes of direct pressure. Also reach out if the follicle becomes swollen, infected, or shows signs of infection like discharge or foul odor. If your bird acts unusually lethargic, loses appetite, or shows behavioral changes, seek veterinary help immediately.
Even if the bleeding stops successfully, scheduling a post removal check up with an avian vet is wise. Your veterinarian can confirm proper healing and rule out complications. They can also examine your bird for any underlying health issues that might affect feather regrowth.
Your bird will grow a new feather in that follicle within several weeks. The new feather develops without a blood supply, so future breakage poses less risk. Follow these aftercare steps carefully to ensure smooth healing and healthy regrowth.
Final Thoughts
A broken blood feather can feel scary. But now you know exactly what to do.
Stay calm and act quickly. Your calm energy helps your bird stay calm too.
Remember the key steps. Restrain your bird properly. Secure the feather shaft with pliers or hemostats.
Pull in one swift motion. Apply pressure right away with sterile gauze. Use cornstarch or clotting powder to stop the bleeding.
These steps work together. Skipping one step can lead to more bleeding or stress for your bird.
Preparation makes all the difference. Keep supplies ready in a small kit. Store gauze, styptic powder, and a towel in one place.
This way, you won’t scramble during an emergency. Every second matters when a blood feather breaks.
Watch your bird closely after removal. Most birds heal well with proper care and rest.
A new feather will grow back within a few weeks. Your bird’s body knows how to repair itself.
Still, never skip the vet visit. An avian vet checks for hidden problems you might miss.
They confirm the follicle is healing correctly. This step gives you peace of mind.
Blood feather injuries happen to many bird owners. You are not alone in this experience.
With practice, you will feel more confident handling this situation. Your bird trusts you to keep it safe.
Trust yourself too. You have the knowledge now to handle a broken blood feather safely and calmly.
Stay prepared, stay gentle, and stay attentive. Your bird’s health depends on your quick and caring action.
Frequently Asked Questions
What exactly is a blood feather and why does it bleed?
A blood feather is a new feather still growing from your bird’s skin. It contains active blood vessels that supply oxygen and nutrients during growth. When this feather breaks, the blood vessel inside ruptures and causes bleeding. The feather shaft looks hollow and may have visible blood inside or around it.
Should I always remove a broken blood feather?
No, you don’t need to remove every broken blood feather. Only remove it if your bird is bleeding significantly and the bleeding won’t stop on its own. If the bleeding is minimal or stops quickly with light pressure, leave the feather alone. Your bird’s body will naturally shed it as the new feather finishes growing. When in doubt, contact your avian veterinarian for guidance.
What’s the most important thing to remember when removing a blood feather?
Pull in one swift, continuous motion. Hesitating or making multiple tugging movements causes extra trauma and more bleeding. Get a firm grip on the feather shaft with small pliers or hemostats, then remove it quickly from the base. This single, decisive action minimizes damage to the follicle and blood vessel.
What should I do if bleeding restarts after I stop applying pressure?
Reapply direct pressure with clean, sterile gauze for another 3 to 5 minutes. Use hemostatic powder or cornstarch on the follicle once bleeding slows. If bleeding continues beyond 10 minutes of steady pressure, contact your avian veterinarian immediately. Persistent bleeding may indicate a deeper issue that needs professional care.
How long does it take for a new feather to grow back?
A new feather typically grows within several weeks after the old one is removed. Your bird’s body naturally regenerates feathers as part of its normal molt cycle. Keep the area clean and monitor the follicle during healing. Schedule a post removal checkup with your avian vet to confirm everything is healing properly.

Hi, I’m Liza — pet lover, lifelong animal enthusiast, and the voice behind Liza4Pets. I created this space to share honest, practical pet care advice for fellow pet parents who want the best for their furry (and not-so-furry) companions.